[导读]2、用Visual C# 创建Windows应用程序 在Visual C#创建一个Windows (GUI) 应用程序要以前版本的VC++ 容易得多。下面将介绍用Visual C#工程文件向导创建Windows应用程序的过程。 创建应用程序框架 在VS .NET IDE中选择...
2、用Visual C# 创建Windows应用程序
在Visual C#创建一个Windows (GUI) 应用程序要以前版本的VC++ 容易得多。下面将介绍用Visual C#工程文件向导创建Windows应用程序的过程。
创建应用程序框架
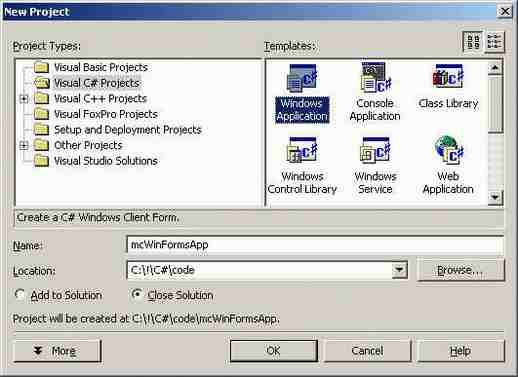
在VS .NET IDE中选择“新建->工程文件->Visual C# 工程文件->Windows 应用程序”:
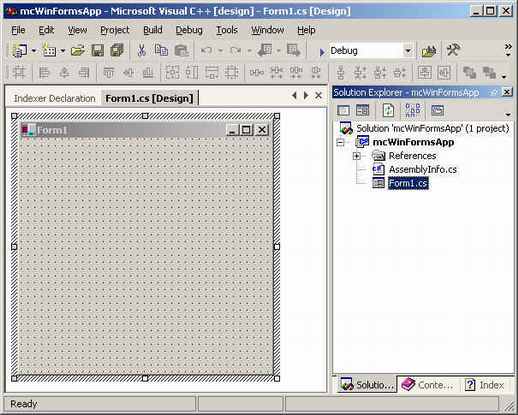
然后点击 OK,出现一个表单设计视图(这与VB或Delphi相同)。在右侧
我们看到了一个解决方案导航器( Solution Explorer)。向导为新表单增加了一个Form1.cs 文件,其中包括了这个表单及其所有子窗口的的代码:
双击 Form1.cs就能看到这个代码:
namespace mcWinFormsApp
{
using System;
using System.Drawing;
using System.Collections;
using System.ComponentModel;
using System.WinForms;
using System.Data;
/// <summary>
/// Summary description for Form1.
/// </summary>
public class Form1 : System.WinForms.Form
{
/// <summary>
/// Required designer variable.
/// </summary>
private System.ComponentModel.Container components;
public Form1()
{
//
// Required for Windows Form Designer support
//
InitializeComponent();
//
// TODO: Add any constructor code after InitializeComponent call
//
}
/// <summary>
/// Clean up any resources being used.
/// </summary>
public override void Dispose()
{
base.Dispose();
components.Dispose();
}
/// <summary>
/// Required method for Designer support - do not modify
/// the contents of this method with the code editor.
/// </summary>
private void InitializeComponent()
{
this.components = new System.ComponentModel.Container ();
//@this.TrayHeight = 0;
//@this.TrayLargeIcon = false;
//@this.TrayAutoArrange = true;
this.Text = "Form1";
this.AutoScaleBaseSize = new System.Drawing.Size (5, 13);
this.Click += new System.EventHandler (this.Form1_Click);
}
protected void Form1_Click (object sender, System.EventArgs e)
{
}
/// <summary>
/// The main entry point for the application.
/// </summary>
public static void Main(string[] args)
{
Application.Run(new Form1());
}
}
}
从以上代码中,我们看到:向导增加了一个默认的名称空间以及对WinForms 所要求的不同名称空间的引用;Form1 类是从System.WinForms.Form中派生出来的;InitializeComponent方法负责初始化(创建)表单及其控件(当在表单中托放下一些控件时,可以看到它的更多细节);Dispose方法负责清除所有不再使用的资源。
添加控件
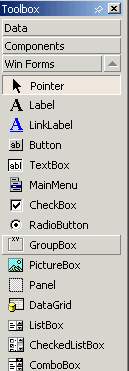
要向一个表单中添加控件或者子窗口,需要打开 工具箱ToolBox。这个工具箱的概念来自VB。点击菜单“视图->工具箱”,激活工具箱功能:

ToolBox(工具箱)窗口的样子如下图所示。现在就可以添加控件了,添加方法与Visual Studio的以前版本一样,拖放或者双击控件都可以。
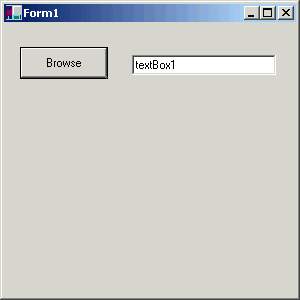
首先在表单上托放下一个按钮和一个编辑框,然后让我们看看系统向初始组件(InitializeComponent)中增加了什么东西。
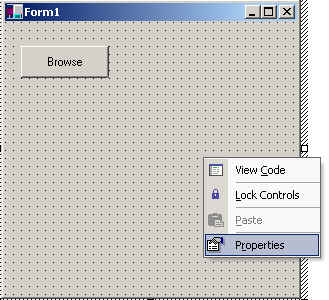
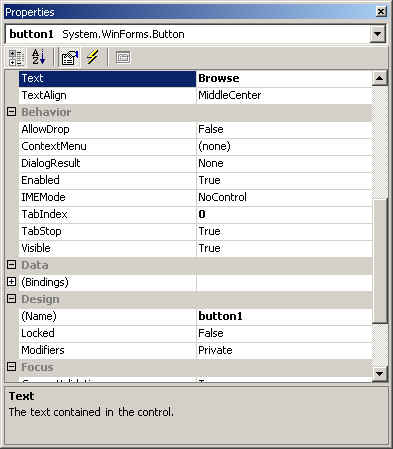
接着在属性窗口中设置控件的属性,这与VB中的操作方式一样。在控件上点击右键,并点中“属性”菜单条就可以调出属性窗口。
现在看看InitializeComponent方法,就会发现这些代码已经增加到其中了。接着手工修改一下这些代码:
this.components = new System.ComponentModel.Container ();
this.button1 = new System.WinForms.Button ();
this.textBox1 = new System.WinForms.TextBox ();
//@this.TrayHeight = 0;
//@this.TrayLargeIcon = false;
//@this.TrayAutoArrange = true;
button1.Location = new System.Drawing.Point (16, 24);
button1.Size = new System.Drawing.Size (88, 32);
button1.TabIndex = 0;
button1.Text = "Browse";
button1.Click += new System.EventHandler (this.button1_Click);
textBox1.Location = new System.Drawing.Point (128, 32);
textBox1.Text = "textBox1";
textBox1.TabIndex = 1;
textBox1.Size = new System.Drawing.Size (144, 20);
this.Text = "Form1";
this.AutoScaleBaseSize = new System.Drawing.Size (5, 13);
this.Click += new System.EventHandler (this.Form1_Click);
this.Controls.Add (this.textBox1);
this.Controls.Add (this.button1);
添加事件处理器
最后,要为按钮增加一个事件处理器,实现浏览文件的目的。在按钮上双击,打开Button1_Click事件处理器。同理,使用同样的方法可以为任何控件编写事件处理器。
protected void button1_Click (object sender, System.EventArgs e)
{
OpenFileDialog fdlg = new OpenFileDialog();
fdlg.Title = "C# Corner Open File Dialog" ;
fdlg.InitialDirectory = @"c:"" ;
fdlg.Filter = "All files (*.*)|*.*|All files (*.*)|*.*" ;
fdlg.FilterIndex = 2 ;
fdlg.RestoreDirectory = true ;
if(fdlg.ShowDialog() == DialogResult.OK)
{
textBox1.Text = fdlg.FileName ;
}
}
到此就完成了所有步骤,剩下的就是运行这个程序。它实现了浏览一个文件,然后将选择的文件名装进文本框的功能。请下载相关代码:winFormApp.zip 。


发表评论